This color LCD display is not an ordinary LCD display which you will need special driver and a relatively powerful processor to blit all those hundred thousands of RGB values to those pixels in order to display something simple such as your temperature sensor’s output. This kind of displays is known as HMI displays and they are widely used in industrial areas such as automation machines to display the machines’ working status, or in SCADA (Supervisory Control And Data Acquisition) for displaying a smart meter’s reading, for example.
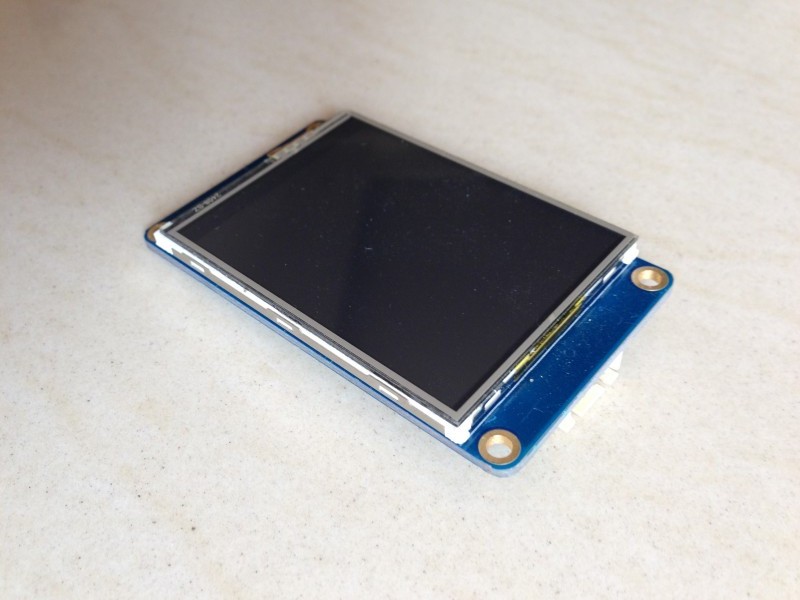

The displays I’ve got from the cheap but works extremely well Chinese market costed me €4 and came with some factory default screens with functionalities one could try out immediately. Very convenient to tell if the shipment arrived intact and well.


HMI Display Programming
There is not much programming to talk about these HMI displays, rather than programming, it is more like configuration – setting this and that so that things will shown on the display as we want them to be.
The usual way of “programming” these displays are using the software provided by the display vendors. Every vendor come with a different software but for those Nextion variations, the software is essentially the same, however, they are still not exchangable. That is, if you are using a Nextion display from vendor A, you cannot use the software from Vendor B to program it, nor the other way ’round.
Sadly, there is no Open Sourced HMI Displays in both hardware and software, nor is there software for programming these display that runs on the Linux or the Mac. However, thanks to the VM technology, we can always run a copy of Windows side by side with our favourite OS.

The HMI programmer requires optional serial port communication for downloading the firmware to the display, therefore, if you are running in a VM and decided to go for this option, make sure the VM passes over the serial port or the USB->Serial device to the Windows OS. Virtualbox does this by default, but I am not sure about the others.
Serial transfer is optional and is slow, even at 115200 baud, transferring a few megabytes (depends on how complex your design is) could take a while. Therefore, Nextion offers another quicker way to transfer the firmware to the HMI display and it is via SD Card. The micro-SD slot at the back of the display is exactly for this purpose. All you need to do is to copy over the .tft file to a FAT formatted micro-SD card, put that card into the display and apply power. The firmware will automatically uploaded to the HMI display with progress showing during the transfer process. Once finished, disconnect the power and remove the card. Upon power on, the HMI display will have your new design showing.
To use the HMI displays is extremely easy and a 9600 baud serial port communication is all you need to update the display.
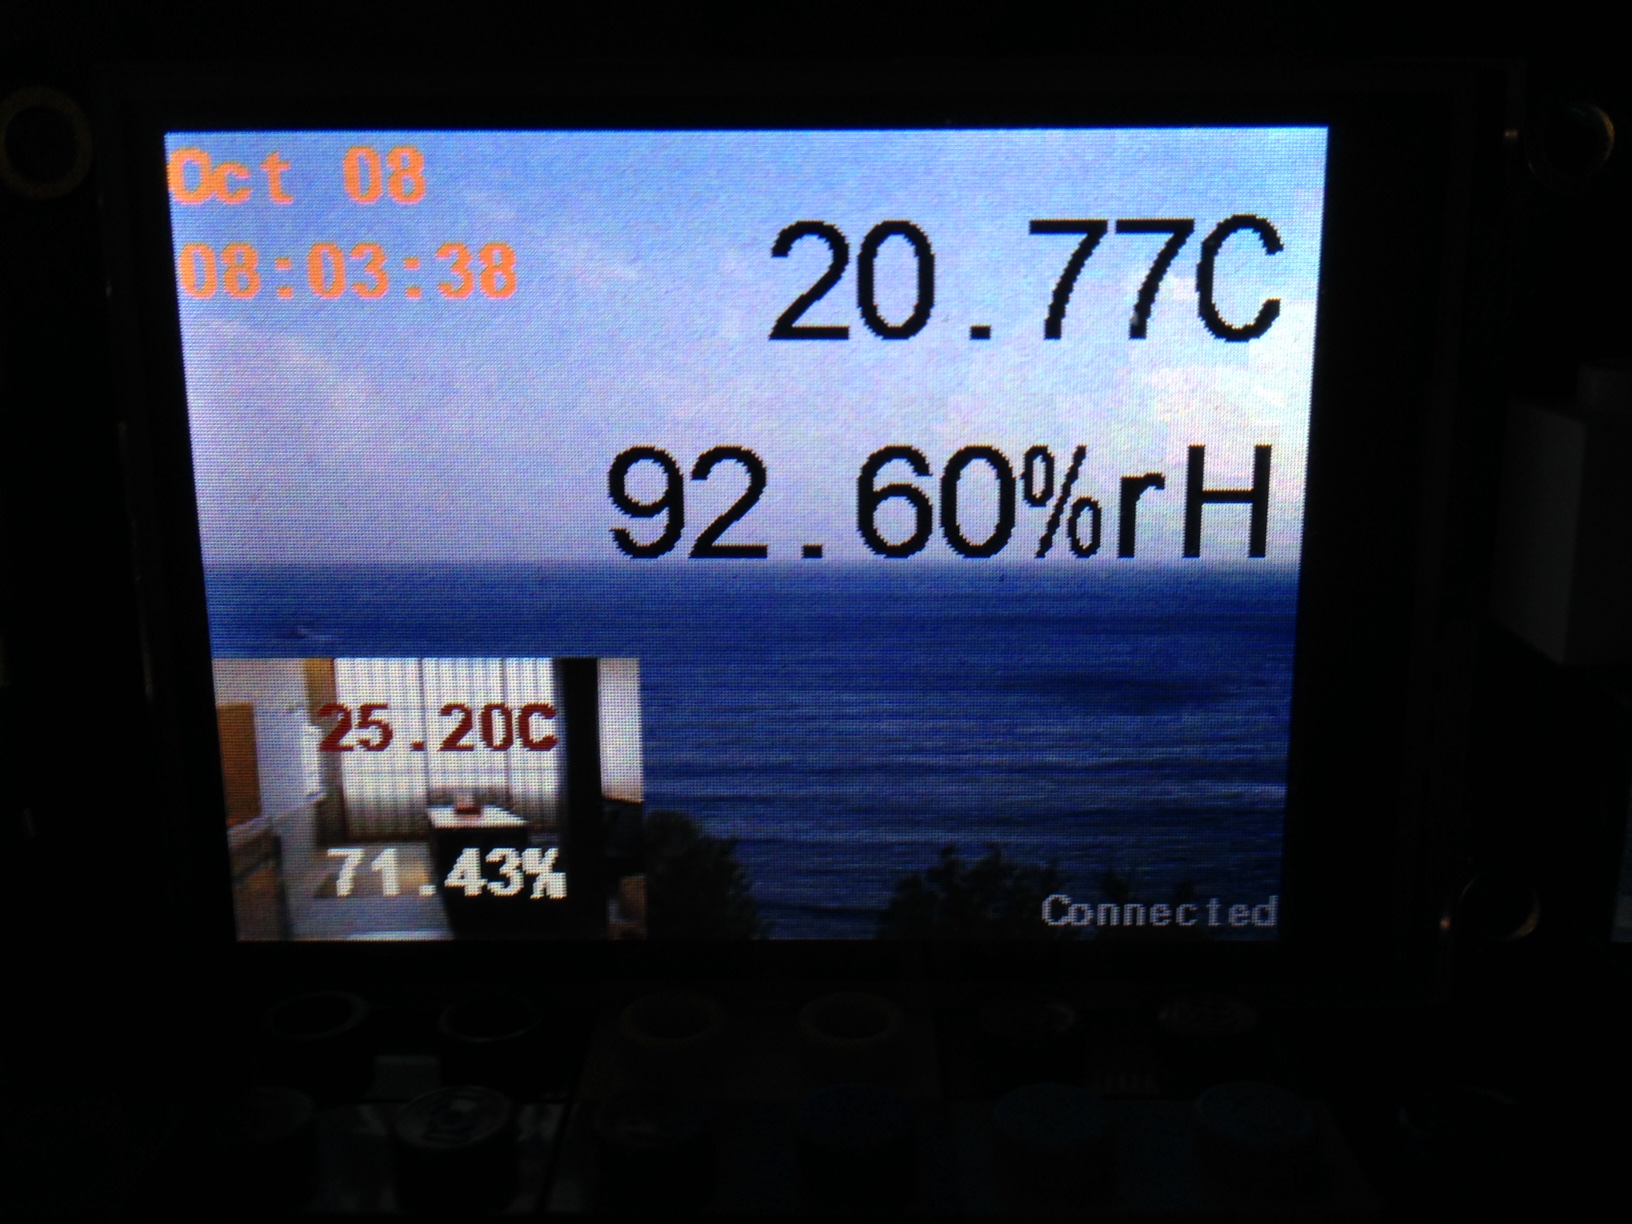
As you can see from the HMI display programmer screen shot, all the items (buttons, pictures, level meters, etc.) shown on the display has a id/name tag. Each of these id has a bunch of attributes and each of these attributes contains a value. For example, the text showing outdoor temperature (the red rectangle in the screen) has a id of “t0”. On the right hand side of the screen you can see the bunch of attributes attached to this “t0” item, namely objname, picc, pco, font, txt, etc., and their corresponding value t0, 5, 0, 0, 00.00 C, etc. respectively.
To change the value of any of these writable attributes, you simply need to issue the command id.attribute=value followed by three 0xFF to the serial port, and viola, the value on the HMI display will get instant updated.
For example, if your temperature sensor reads the current out door temperature as 25.5ºC, then all you need to do to update this to the HMI display from your Photon or whatever controller you are using is to perform:
serial1.print("t0.txt=\"25.5ºC\"");
serial1.write(0xff);
serial1.write(0xff);
serial1.write(0xff);
That’s it, no more complex library to maintain, no need for I2C or SPI interface. There are also commands you can use to draw simple graphics such as lines, filled or empty rectangles, etc.. Some of these displays also support touch screen, which the touch coordinates are returned via the same serial port.
What about receiving data from the Nextion to the Photon? How is that done. I am having trouble with that.